Understanding angles is crucial in geometry, especially when working within the x-y coordinate system. An angle is defined as the space or gap created between two line segments, often referred to as the sides of a triangle. The measurement of angles is expressed in degrees, ranging from 0 to 360 degrees, with 0 degrees aligned along the positive x-axis. As you move counterclockwise around the circle, the angle increases, reaching 90 degrees at the positive y-axis, 180 degrees at the negative x-axis, and 270 degrees at the negative y-axis, before returning to 360 degrees.
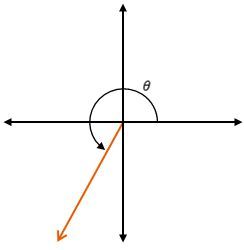
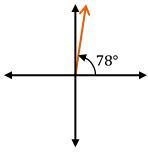
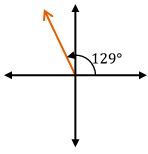
To visualize angles, they are typically drawn in what is known as standard position. This means that the initial side of the angle lies along the positive x-axis, while the terminal side extends from this initial side to form the angle. For example, a 60-degree angle is drawn starting from the positive x-axis and extending upwards, creating a gap that is less than 90 degrees. In contrast, a 150-degree angle is drawn from the same initial side but extends into the second quadrant, being greater than 90 degrees but less than 180 degrees.
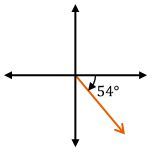
Angles can be classified based on their measurements relative to 90 degrees. Acute angles are those that measure less than 90 degrees, obtuse angles are greater than 90 degrees but less than 180 degrees, and right angles are exactly 90 degrees. Additionally, angles can be positive or negative; positive angles are measured counterclockwise from the positive x-axis, while negative angles are measured clockwise. For instance, a negative 60-degree angle would be drawn downward from the positive x-axis.
In summary, mastering the concept of angles, their measurement, and their classification is essential for further studies in mathematics. Understanding how to sketch angles in standard position and recognizing their types will aid in solving various geometric problems.