Table of contents
- 1. A Review of General Chemistry5h 5m
- Summary23m
- Intro to Organic Chemistry5m
- Atomic Structure16m
- Wave Function9m
- Molecular Orbitals17m
- Sigma and Pi Bonds10m
- Octet Rule12m
- Bonding Preferences12m
- Formal Charges6m
- Skeletal Structure14m
- Lewis Structure20m
- Condensed Structural Formula15m
- Degrees of Unsaturation15m
- Constitutional Isomers14m
- Resonance Structures46m
- Hybridization23m
- Molecular Geometry16m
- Electronegativity22m
- 2. Molecular Representations1h 14m
- 3. Acids and Bases2h 46m
- 4. Alkanes and Cycloalkanes4h 17m
- IUPAC Naming29m
- Alkyl Groups13m
- Naming Cycloalkanes10m
- Naming Bicyclic Compounds10m
- Naming Alkyl Halides7m
- Naming Alkenes3m
- Naming Alcohols8m
- Naming Amines13m
- Cis vs Trans21m
- Conformational Isomers13m
- Newman Projections14m
- Drawing Newman Projections16m
- Barrier To Rotation7m
- Ring Strain8m
- Axial vs Equatorial7m
- Cis vs Trans Conformations4m
- Equatorial Preference14m
- Chair Flip9m
- Calculating Energy Difference Between Chair Conformations17m
- A-Values17m
- Decalin7m
- 5. Chirality3h 39m
- Constitutional Isomers vs. Stereoisomers9m
- Chirality12m
- Test 1:Plane of Symmetry7m
- Test 2:Stereocenter Test17m
- R and S Configuration43m
- Enantiomers vs. Diastereomers13m
- Atropisomers9m
- Meso Compound12m
- Test 3:Disubstituted Cycloalkanes13m
- What is the Relationship Between Isomers?16m
- Fischer Projection10m
- R and S of Fischer Projections7m
- Optical Activity5m
- Enantiomeric Excess20m
- Calculations with Enantiomeric Percentages11m
- Non-Carbon Chiral Centers8m
- 6. Thermodynamics and Kinetics1h 22m
- 7. Substitution Reactions1h 48m
- 8. Elimination Reactions2h 30m
- 9. Alkenes and Alkynes2h 9m
- 10. Addition Reactions3h 19m
- Addition Reaction6m
- Markovnikov5m
- Hydrohalogenation6m
- Acid-Catalyzed Hydration17m
- Oxymercuration15m
- Hydroboration26m
- Hydrogenation6m
- Halogenation6m
- Halohydrin12m
- Carbene12m
- Epoxidation8m
- Epoxide Reactions9m
- Dihydroxylation8m
- Ozonolysis7m
- Ozonolysis Full Mechanism24m
- Oxidative Cleavage3m
- Alkyne Oxidative Cleavage6m
- Alkyne Hydrohalogenation3m
- Alkyne Halogenation2m
- Alkyne Hydration7m
- Alkyne Hydroboration2m
- 11. Radical Reactions1h 58m
- 12. Alcohols, Ethers, Epoxides and Thiols2h 40m
- Alcohol Nomenclature4m
- Naming Ethers6m
- Naming Epoxides18m
- Naming Thiols11m
- Alcohol Synthesis7m
- Leaving Group Conversions - Using HX11m
- Leaving Group Conversions - SOCl2 and PBr313m
- Leaving Group Conversions - Sulfonyl Chlorides5m
- Leaving Group Conversions Summary4m
- Williamson Ether Synthesis3m
- Making Ethers - Alkoxymercuration4m
- Making Ethers - Alcohol Condensation4m
- Making Ethers - Acid-Catalyzed Alkoxylation4m
- Making Ethers - Cumulative Practice10m
- Ether Cleavage8m
- Alcohol Protecting Groups3m
- t-Butyl Ether Protecting Groups5m
- Silyl Ether Protecting Groups10m
- Sharpless Epoxidation9m
- Thiol Reactions6m
- Sulfide Oxidation4m
- 13. Alcohols and Carbonyl Compounds2h 17m
- 14. Synthetic Techniques1h 26m
- 15. Analytical Techniques:IR, NMR, Mass Spect7h 3m
- Purpose of Analytical Techniques5m
- Infrared Spectroscopy16m
- Infrared Spectroscopy Table31m
- IR Spect:Drawing Spectra40m
- IR Spect:Extra Practice26m
- NMR Spectroscopy10m
- 1H NMR:Number of Signals26m
- 1H NMR:Q-Test26m
- 1H NMR:E/Z Diastereoisomerism8m
- H NMR Table24m
- 1H NMR:Spin-Splitting (N + 1) Rule22m
- 1H NMR:Spin-Splitting Simple Tree Diagrams11m
- 1H NMR:Spin-Splitting Complex Tree Diagrams12m
- 1H NMR:Spin-Splitting Patterns8m
- NMR Integration18m
- NMR Practice14m
- Carbon NMR4m
- Structure Determination without Mass Spect47m
- Mass Spectrometry12m
- Mass Spect:Fragmentation28m
- Mass Spect:Isotopes27m
- 16. Conjugated Systems6h 13m
- Conjugation Chemistry13m
- Stability of Conjugated Intermediates4m
- Allylic Halogenation12m
- Reactions at the Allylic Position39m
- Conjugated Hydrohalogenation (1,2 vs 1,4 addition)26m
- Diels-Alder Reaction9m
- Diels-Alder Forming Bridged Products11m
- Diels-Alder Retrosynthesis8m
- Molecular Orbital Theory9m
- Drawing Atomic Orbitals6m
- Drawing Molecular Orbitals17m
- HOMO LUMO4m
- Orbital Diagram:3-atoms- Allylic Ions13m
- Orbital Diagram:4-atoms- 1,3-butadiene11m
- Orbital Diagram:5-atoms- Allylic Ions10m
- Orbital Diagram:6-atoms- 1,3,5-hexatriene13m
- Orbital Diagram:Excited States4m
- Pericyclic Reaction10m
- Thermal Cycloaddition Reactions26m
- Photochemical Cycloaddition Reactions26m
- Thermal Electrocyclic Reactions14m
- Photochemical Electrocyclic Reactions10m
- Cumulative Electrocyclic Problems25m
- Sigmatropic Rearrangement17m
- Cope Rearrangement9m
- Claisen Rearrangement15m
- 17. Ultraviolet Spectroscopy51m
- 18. Aromaticity2h 34m
- 19. Reactions of Aromatics: EAS and Beyond5h 1m
- Electrophilic Aromatic Substitution9m
- Benzene Reactions11m
- EAS:Halogenation Mechanism6m
- EAS:Nitration Mechanism9m
- EAS:Friedel-Crafts Alkylation Mechanism6m
- EAS:Friedel-Crafts Acylation Mechanism5m
- EAS:Any Carbocation Mechanism7m
- Electron Withdrawing Groups22m
- EAS:Ortho vs. Para Positions4m
- Acylation of Aniline9m
- Limitations of Friedel-Crafts Alkyation19m
- Advantages of Friedel-Crafts Acylation6m
- Blocking Groups - Sulfonic Acid12m
- EAS:Synergistic and Competitive Groups13m
- Side-Chain Halogenation6m
- Side-Chain Oxidation4m
- Reactions at Benzylic Positions31m
- Birch Reduction10m
- EAS:Sequence Groups4m
- EAS:Retrosynthesis29m
- Diazo Replacement Reactions6m
- Diazo Sequence Groups5m
- Diazo Retrosynthesis13m
- Nucleophilic Aromatic Substitution28m
- Benzyne16m
- 20. Phenols55m
- 21. Aldehydes and Ketones: Nucleophilic Addition4h 56m
- Naming Aldehydes8m
- Naming Ketones7m
- Oxidizing and Reducing Agents9m
- Oxidation of Alcohols28m
- Ozonolysis7m
- DIBAL5m
- Alkyne Hydration9m
- Nucleophilic Addition8m
- Cyanohydrin11m
- Organometallics on Ketones19m
- Overview of Nucleophilic Addition of Solvents13m
- Hydrates6m
- Hemiacetal9m
- Acetal12m
- Acetal Protecting Group16m
- Thioacetal6m
- Imine vs Enamine15m
- Addition of Amine Derivatives5m
- Wolff Kishner Reduction7m
- Baeyer-Villiger Oxidation39m
- Acid Chloride to Ketone7m
- Nitrile to Ketone9m
- Wittig Reaction18m
- Ketone and Aldehyde Synthesis Reactions14m
- 22. Carboxylic Acid Derivatives: NAS2h 51m
- Carboxylic Acid Derivatives7m
- Naming Carboxylic Acids9m
- Diacid Nomenclature6m
- Naming Esters5m
- Naming Nitriles3m
- Acid Chloride Nomenclature5m
- Naming Anhydrides7m
- Naming Amides5m
- Nucleophilic Acyl Substitution18m
- Carboxylic Acid to Acid Chloride6m
- Fischer Esterification5m
- Acid-Catalyzed Ester Hydrolysis4m
- Saponification3m
- Transesterification5m
- Lactones, Lactams and Cyclization Reactions10m
- Carboxylation5m
- Decarboxylation Mechanism14m
- Review of Nitriles46m
- 23. The Chemistry of Thioesters, Phophate Ester and Phosphate Anhydrides1h 10m
- 24. Enolate Chemistry: Reactions at the Alpha-Carbon1h 53m
- Tautomerization9m
- Tautomers of Dicarbonyl Compounds6m
- Enolate4m
- Acid-Catalyzed Alpha-Halogentation4m
- Base-Catalyzed Alpha-Halogentation3m
- Haloform Reaction8m
- Hell-Volhard-Zelinski Reaction3m
- Overview of Alpha-Alkylations and Acylations5m
- Enolate Alkylation and Acylation12m
- Enamine Alkylation and Acylation16m
- Beta-Dicarbonyl Synthesis Pathway7m
- Acetoacetic Ester Synthesis13m
- Malonic Ester Synthesis15m
- 25. Condensation Chemistry2h 9m
- 26. Amines1h 43m
- 27. Heterocycles2h 0m
- Nomenclature of Heterocycles15m
- Acid-Base Properties of Nitrogen Heterocycles10m
- Reactions of Pyrrole, Furan, and Thiophene13m
- Directing Effects in Substituted Pyrroles, Furans, and Thiophenes16m
- Addition Reactions of Furan8m
- EAS Reactions of Pyridine17m
- SNAr Reactions of Pyridine18m
- Side-Chain Reactions of Substituted Pyridines20m
- 28. Carbohydrates5h 53m
- Monosaccharide20m
- Monosaccharides - D and L Isomerism9m
- Monosaccharides - Drawing Fischer Projections18m
- Monosaccharides - Common Structures6m
- Monosaccharides - Forming Cyclic Hemiacetals12m
- Monosaccharides - Cyclization18m
- Monosaccharides - Haworth Projections13m
- Mutarotation11m
- Epimerization9m
- Monosaccharides - Aldose-Ketose Rearrangement8m
- Monosaccharides - Alkylation10m
- Monosaccharides - Acylation7m
- Glycoside6m
- Monosaccharides - N-Glycosides18m
- Monosaccharides - Reduction (Alditols)12m
- Monosaccharides - Weak Oxidation (Aldonic Acid)7m
- Reducing Sugars23m
- Monosaccharides - Strong Oxidation (Aldaric Acid)11m
- Monosaccharides - Oxidative Cleavage27m
- Monosaccharides - Osazones10m
- Monosaccharides - Kiliani-Fischer23m
- Monosaccharides - Wohl Degradation12m
- Monosaccharides - Ruff Degradation12m
- Disaccharide30m
- Polysaccharide11m
- 29. Amino Acids4h 20m
- Proteins and Amino Acids19m
- L and D Amino Acids14m
- Polar Amino Acids14m
- Amino Acid Chart1h 18m
- Acid-Base Properties of Amino Acids33m
- Isoelectric Point14m
- Amino Acid Synthesis: HVZ Method12m
- Synthesis of Amino Acids: Acetamidomalonic Ester Synthesis16m
- Synthesis of Amino Acids: N-Phthalimidomalonic Ester Synthesis13m
- Synthesis of Amino Acids: Strecker Synthesis13m
- Reactions of Amino Acids: Esterification7m
- Reactions of Amino Acids: Acylation3m
- Reactions of Amino Acids: Hydrogenolysis6m
- Reactions of Amino Acids: Ninhydrin Test11m
- 30. Peptides and Proteins2h 42m
- Peptides12m
- Primary Protein Structure4m
- Secondary Protein Structure17m
- Tertiary Protein Structure11m
- Disulfide Bonds17m
- Quaternary Protein Structure10m
- Summary of Protein Structure7m
- Intro to Peptide Sequencing2m
- Peptide Sequencing: Partial Hydrolysis25m
- Peptide Sequencing: Partial Hydrolysis with Cyanogen Bromide7m
- Peptide Sequencing: Edman Degradation28m
- Merrifield Solid-Phase Peptide Synthesis18m
- 31. Catalysis in Organic Reactions1h 30m
- 32. Lipids 2h 50m
- 33. The Organic Chemistry of Metabolic Pathways2h 52m
- Intro to Metabolism6m
- ATP and Energy6m
- Intro to Coenzymes3m
- Coenzymes in Metabolism16m
- Energy Production in Biochemical Pathways5m
- Intro to Glycolysis3m
- Catabolism of Carbohydrates: Glycolysis27m
- Glycolysis Summary15m
- Pyruvate Oxidation (Simplified)4m
- Anaerobic Respiration11m
- Catabolism of Fats: Glycerol Metabolism11m
- Intro to Citric Acid Cycle7m
- Structures of the Citric Acid Cycle19m
- The Citric Acid Cycle35m
- 34. Nucleic Acids1h 32m
- 35. Transition Metals6h 14m
- Electron Configuration of Elements45m
- Coordination Complexes20m
- Ligands24m
- Electron Counting10m
- The 18 and 16 Electron Rule13m
- Cross-Coupling General Reactions40m
- Heck Reaction40m
- Stille Reaction13m
- Suzuki Reaction25m
- Sonogashira Coupling Reaction17m
- Fukuyama Coupling Reaction15m
- Kumada Coupling Reaction13m
- Negishi Coupling Reaction16m
- Buchwald-Hartwig Amination Reaction19m
- Eglinton Reaction17m
- Catalytic Allylic Alkylation18m
- Alkene Metathesis23m
- 36. Synthetic Polymers1h 49m
- Introduction to Polymers6m
- Chain-Growth Polymers10m
- Radical Polymerization15m
- Cationic Polymerization8m
- Anionic Polymerization8m
- Polymer Stereochemistry3m
- Ziegler-Natta Polymerization4m
- Copolymers6m
- Step-Growth Polymers11m
- Step-Growth Polymers: Urethane6m
- Step-Growth Polymers: Polyurethane Mechanism10m
- Step-Growth Polymers: Epoxy Resin8m
- Polymers Structure and Properties8m
4. Alkanes and Cycloalkanes
Axial vs Equatorial
Struggling with Organic Chemistry?
Join thousands of students who trust us to help them ace their exams!Watch the first video
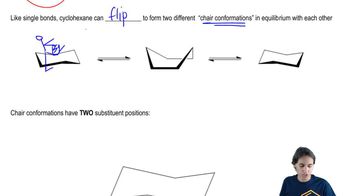
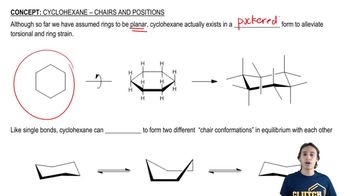
How chairs flip from one conformation to another
Johnny Betancourt
Video duration:
4mPlay a video:


