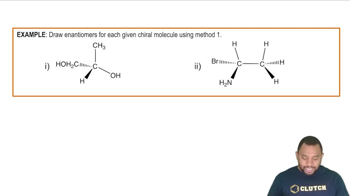
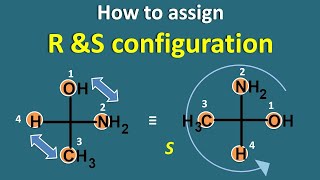
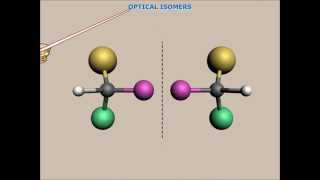
In this video, we're gonna talk about the methods we can use in drawing an enantiomer. Now when drawing enantiomers of a chiral molecule, there are 2 methods available. Now, with method 1, we're gonna draw an image the molecule sees in the mirror. So let's just imagine this blue dotted line here is our mirror, and this molecule was looking into it. It would see back its own reflection. Now, what would this look like? Well, we'd still have this carbon here in the center, it would see this n h two still at the top, And what else would it see? Well, it's looking in the mirror, so it'd see these 2 over here, looking back at it, so we'd have the H with still the dash wedge bond, And we'd have our CH3 group. So we'd have it like this. Remember we wanna show the connection between the carbon carbons. So it's best to draw it this way. And then we'd have the o h back here. This new image that I've just drawn is the mirror image of my original molecule, or it's enantiomer. Remember, enantiomer is the mirror image. Now this one, method 1 is a little bit tricky, because you have to look into the mirror, and you have to draw it kind of like backwards. And your dashed wedge to a solid wedge on the chiral center. You'll keep the molecule in place the way it is. So here carbon would still be here, this NH 2 would still be here, this Oh would still be over here. And all we're doing here is we're inverting the bonds. So now, this dashed bond becomes a wedged bond, and it has the H now. And then this wedged bond becomes a dashed bond, And it has a CH3 connected to it. In this method we keep the molecule stationary in the same spot, and we're just changing the bonds that show spatial orientation. Alright. So we could call this the inversion method for method 2. Right. So these are the 2 different ways we can draw the enantiomer of our original chiral molecule.
 02:37
02:37